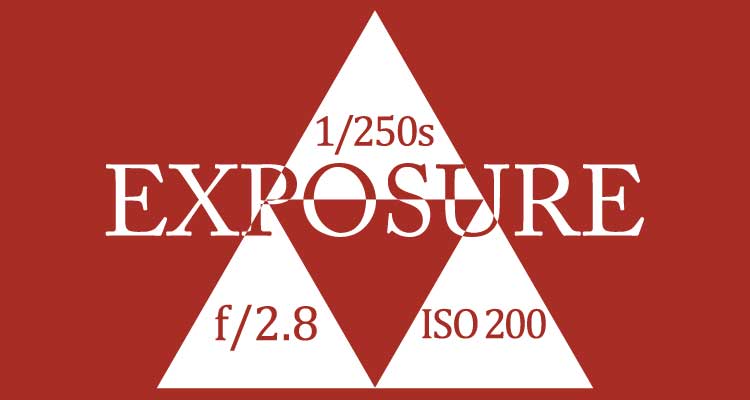
The Triangle
Difficulty: Beginner
What’s needed:
- Any SLR with a manual mode
- A subject in motion
- Two subjects at different distances from you
- An indoor scene
Introduction
If you understand the reference in the title, hey listen! Otherwise, just understand that there are three technical settings that help you achieve a proper exposure of a scene: shutter speed, aperture, and light sensitivity (ISO). All three effect the exposure, or “brightness”, of your shot, but they have other impacts as well.
These three form the foundation for an understanding of how photography, from the Greek roots phōtos and graphé meaning “drawing with light”, works.
Shutter Speed
Shutter speed, also referred to as exposure time (“exposure” for short), is the length of time during which your camera’s shutter is in the open position. This is typically for fractions of a second, although if you’re aiming for something more creative you may be aiming for several seconds, if not minutes, or even months. The longer the shutter speed, the longer your sensor or film is allowed to absorb the light coming through your lens.
Think back to grade school math class. What’s a longer duration? 1/250s or 1/1000s? Hopefully you said 1/250s. 1/250s will also result in a brighter exposure, as you’ve allowed four times as long for light to enter. However, a longer shutter speed will cause something else too: motion blur.
I won’t go into scientific specifics, but light is constantly reflecting from your scene onto your sensor when you take a photo, traveling at nearly 300 million meters per second. That means, if your scene shifts and your shutter is still open, you’ll get blur. If you shoot sports photography, you’ll typically find yourself shooting at shutter speeds greater than 1/250s; anything lower and you’ll just get a blur.
The best rule of thumb to avoid blur: don’t shoot slower than the focal length as the denominator (e.g., if you’re shooting at 200mm, don’t shoot slower than 1/200s).
Aperture
Aperture is the opening through which light travels (before and after traveling through a series of lenses) before reaching your sensor. You’ve probably seen a representation of the diaphragm that most lenses use to control the size of aperture, most famously by “Aperture Science Center” from Valve’s Portal game series.
Again, I won’t get science-y about how lenses work, but with a smaller opening, you’re obviously letting less light come through your lens to your sensor. A larger opening, and you’ll get the opposite and a brighter exposure. Like shutter speed, aperture has another effect as well: field of focus.
Ever wonder how some headshot photographs have a nice clear focus on someone’s face, and then a blurred background? This has to do with a large aperture: with a larger opening you’ll get less in focus and with a smaller opening you’ll get a larger field of focus.
What do I mean by field of focus? Imagine a horizontal plane with an axis parallel to the direction you are facing. The field of focus is the distances between which the view in front of you is in focus. With a larger opening, the length between where your view comes into focus and where your view leaves focus may only be a few inches or centimeters. With a smaller opening, that length and field increases by depth, which means something 4 foot away from you and something 6 feet away from your will both be in focus (depending on the aperture and focal length).
As for the “units of aperture”, we talk about f-stop, or the ratio of the focal length (distance from the effective lens element to your sensor) to the diameter of the entrance lens. f/1.8, f/2.8, f/5.6, f/11, etc. If you’ve dug around catalogs for lenses, you’ve probably seen a correlation between smaller f-numbers and higher lens prices. The reasoning for that lies in the ratio: if you want something that can open wider and has a large focal length (“zoom”), you’ll need a larger piece of glass within your lens, and those pieces of glass aren’t cheap.
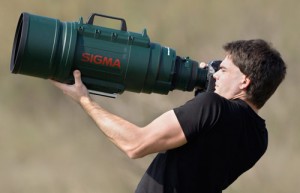
How much does it cost? $26,000.
If you divide 500mm by 2.8, you’ll get around 200mm, or 8 inches, which matches the diameter of that thing. (DigitalCameraWorld.com)
As a side note, you may also hear photographers talking about “fast lenses”. This of course doesn’t refer to shutter speed since shutter speed is dependent on your camera body, but the fact that you can shoot at faster shutter speeds with a lens that can achieve brighter exposures thanks to a higher maximum aperture.
Key takeaways: while your widest aperture (like f/2.8) makes life easier with faster shutter speeds, it makes group photos harder unless everyone is in a single row. A lens’s widest aperture is not always its sharpest (a lens with maximum f/2.8 might be sharpest at f/4.0).
Light Sensitivity
Light sensitivity, also referred to as ISO (International Organization for Standardization is a governing body on all sorts of measurements), was originally derived from the film speed ratings for film rolls back when film photography first came about. Common film speeds, labeled along the sides of film rolls, included ISO 100, 200, 400, 800.
Without getting nerdy, light sensitivity refers to the rate at which your film or sensor “absorbs” reflected light. With a smaller ISO number, the sensor is less sensitive and will capture light at a slower rate, thus resulting in a darker exposure. The opposite happens with a higher ISO number. With night shots, you’ll want higher ISO numbers so you can achieve brighter shots without sacrificing your shutter speed.
Nowadays, digital cameras can support as high as ISO 128000, but I rarely shoot above ISO 800 because as much as technology has improved over the years, you’ll still get the one bad side effect to higher ISO: image noise.
Noise is the weird fuzzy patches of pixels you may see in photos. Some people like it, some people hate it. As a photojournalist who takes photos for print, I hate it. The higher the ISO, the greater the chance that there will be noise. Nowadays (last updated 2023), the highest I’m willing to shoot at on my Canon EOS R is ISO 6400 and that’s when doing astrophotography.
Summary
You’ll have to balance these three factors depending on what you want from your shot.
If you’ve got a fast subject, you’ll want a faster shutter speed. But a faster shutter speed means a darker exposure, so you’ll have to compensate by either increasing ISO to a higher sensitivity or increasing aperture to a larger size. (I’ll shoot f/2.8, 1/320s, ISO 800 at 200mm during a football game).
If you’ve got two subjects at different distances from you, you’ll want a smaller aperture. But that also means a darker exposure, so you’ll have to compensate by either increasing ISO or slowing the shutter speed. (I’ll shoot f/7.0, 1/40s, ISO 200 at 36mm when taking a group portrait).
As you might see, ISO is the first line of compensation you’ll want to use, since it has less of a negative effect on your subject if you need a certain field of focus or lack of motion blur, unless you’re worried about image noise but plenty of programs can help mitigate that nowadays.
In summary,
Shutter speed: 1/30s (brighter, shorter time, more blur) –> 1/1000s (darker, longer time, less blur)
Aperture: f/1.8 (brighter, larger, smaller field of focus) –> f/22 (darker, smaller, larger field of focus)
Light Sensitivity: ISO 3200 (brighter, more sensitive, more fuzz) –> ISO 100 (darker, less sensitive, less fuzz)
Updated June 17, 2023: Canon used to have a simulator on their Canadian website but it’s gone dead. Here’s another one at CameraSim.com!
Questions? Comment below!
